Local Installation
This section of the documentation will cover the steps required only for users who wish to use webforJ for web and/or application development with a local BBj instance on their machine. This installation will not allow users to contribute to the webforJ foundation code itself.
This walkthrough will cover installation on a Windows system - installation steps may vary for Mac/Linux OS devices.
Installation will be broken down into the following steps:
- Java and Maven download and configuration
- BBj download and installation
- Using the BBj Plugin Manager to create your application
- Launching your application
1. Java and Maven Download and Configuration
In order to use webforJ, you must first have Java and Maven installed and properly configured. If you already have Java and Maven downloaded, please skip to Step 2. If you also have BBj installed on your system, please skip to Step 3.
Java
Java OpenJDK17 can be found by following this link. It is recommended to allow the installation to handle setting the JAVA_HOME variable during installation, where applicable.
Maven
Maven should also be downloaded, and can be found at this link. It is recommended to configure your system environment variables with Maven - a guide for installation and configuration for Windows users can be found here.
2. BBj Download and Installation
While following this step, be sure to install BBj version 22.14 or newerThis video can help with the installation of BBj if you need assistance with setup. The installation section of the BASIS website can be found at this link
It is recommended to use the latest stable revision build of BBj, and to select "BBj" from the list of options, without "Barista" or "Addon".
3. Install and Configure the webforJ Plugin
Once BBj has been installed, we can access the Plugin Manager in order to install tools needed to configure webforJ. To start, type "Plugin Manager" into the start menu or Finder.
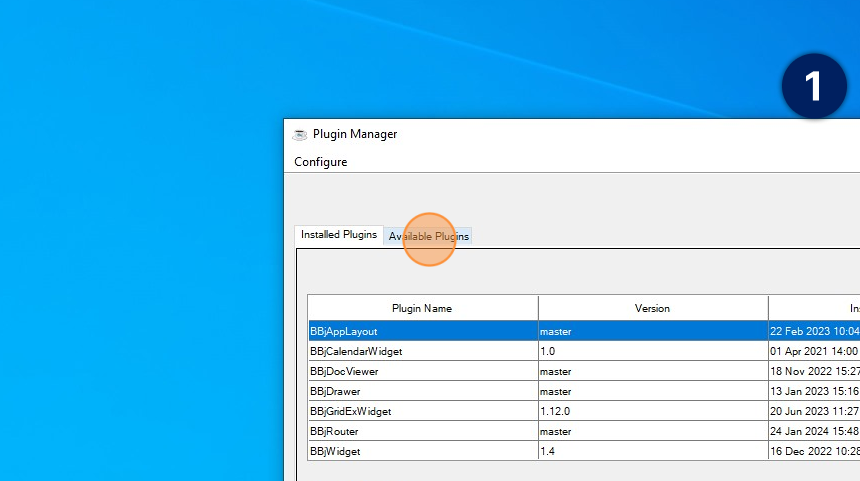
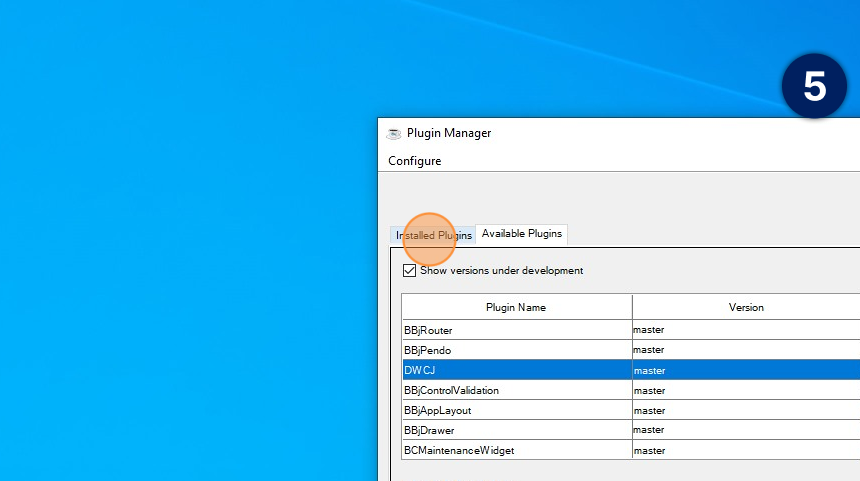
After the plugin manager has been opened, navigate to the "Available Plugins" tab towards the top.
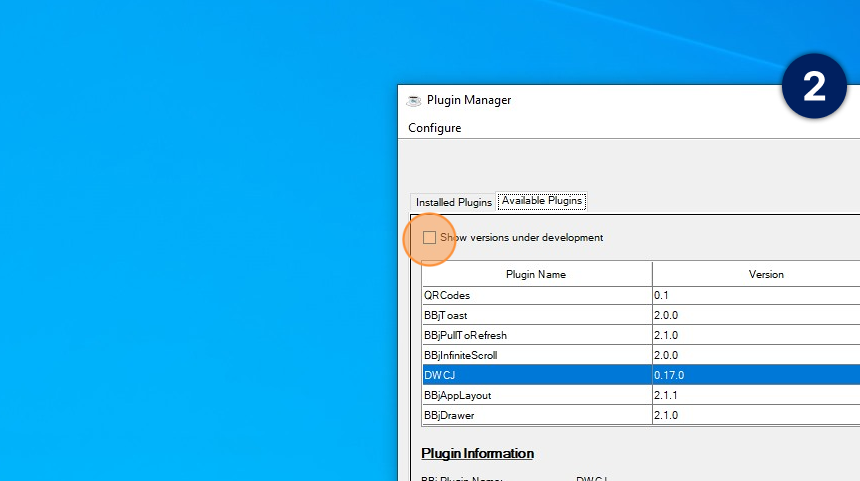
Once in this section, check the "Show versions under development" checkbox
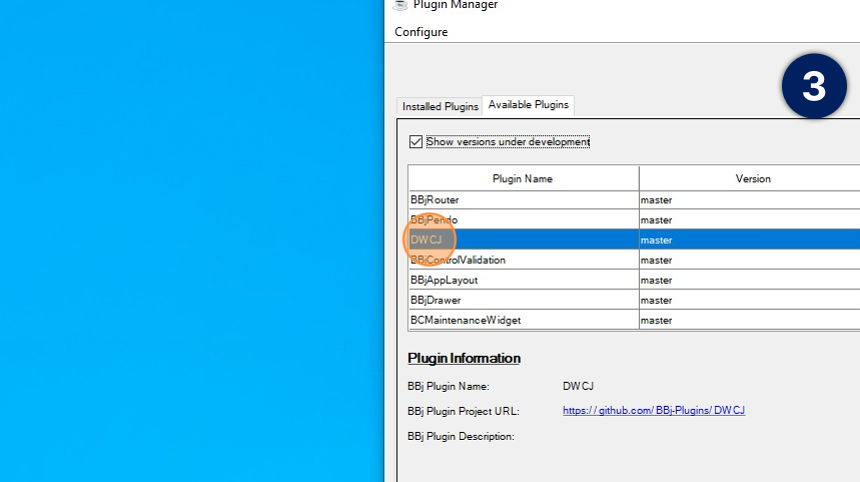
The DWCJ entry should now be visible in the list of available plugins for download. Click on this entry in the list to select it.
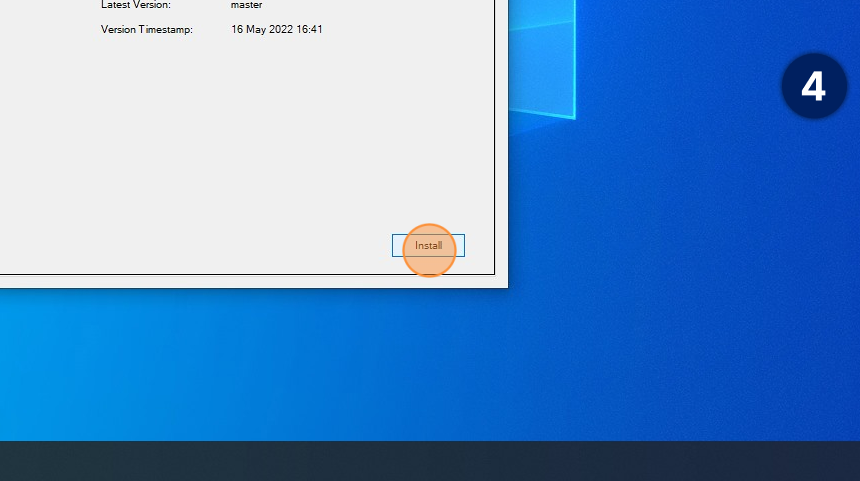
With the DWCJ entry selected, click the "Install" button
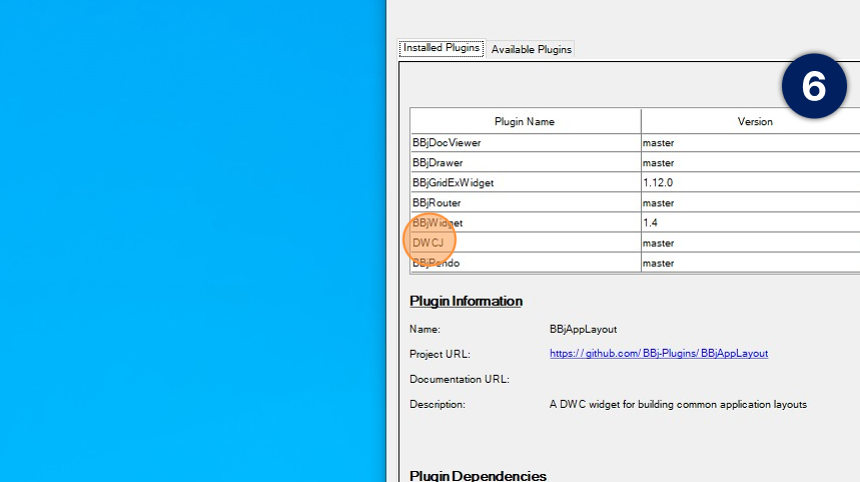
Once the plugin has finished installing, click on the "Installed Plugins" tab at the top.
This tab displays installed plugins, which should now include the DWCJ entry. Click on the entry within the list.
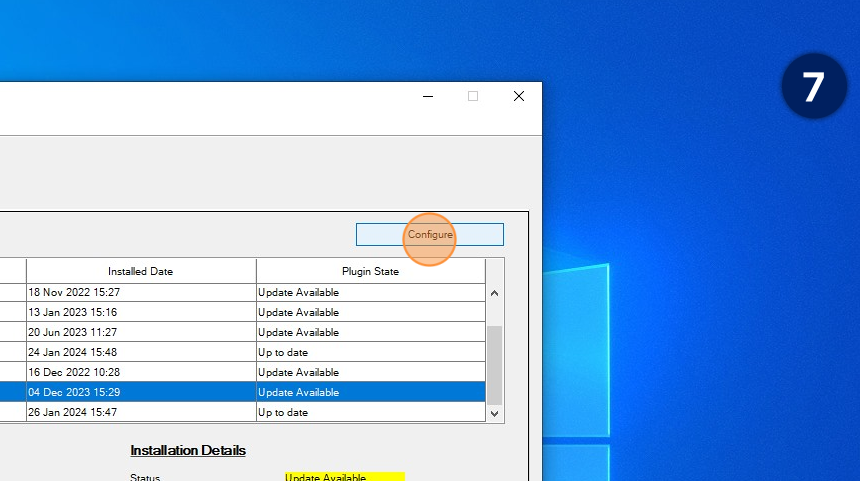
With the DWCJ entry selected, click the "Configure" button
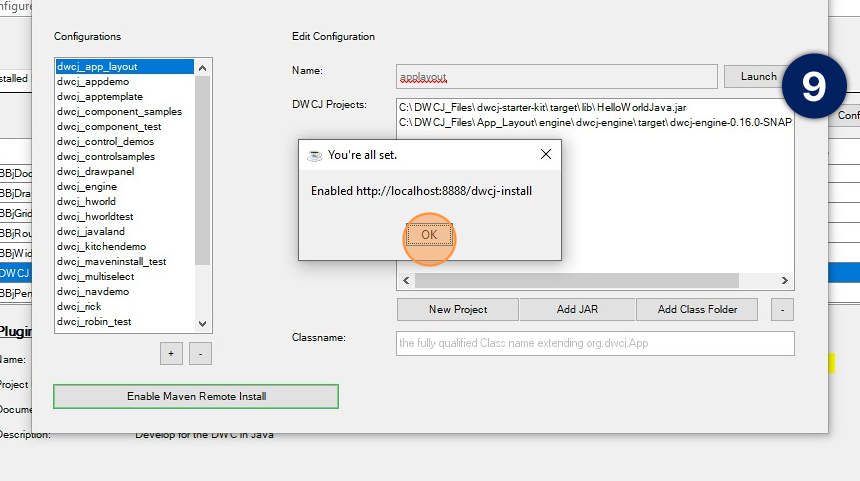
On the window that opens, click the "Enable Maven Remote Install" button at the bottom left of the window.
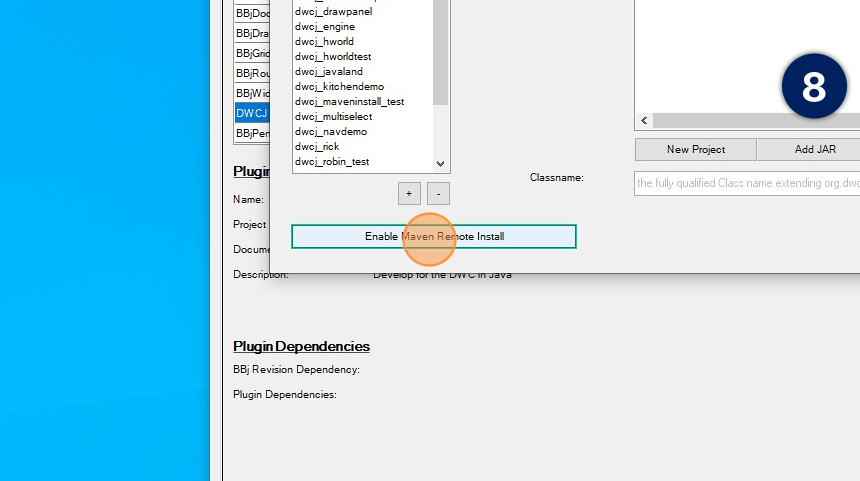
Alternatively, navigate to the bin directory within your bbx folder and run the following command:
./bbj -tIO DWCJ/cli.bbj - enable_remote_install
A dialog should display that remote installation has been enabled. Click "OK" to close this dialog.
4. Clone the Repository
Once BBj and the required webforJ plugin are installed and configured, we can clone the "Hello World" repository from the webforJ Github page. This project comes with the necessary tools to run your first webforJ program!
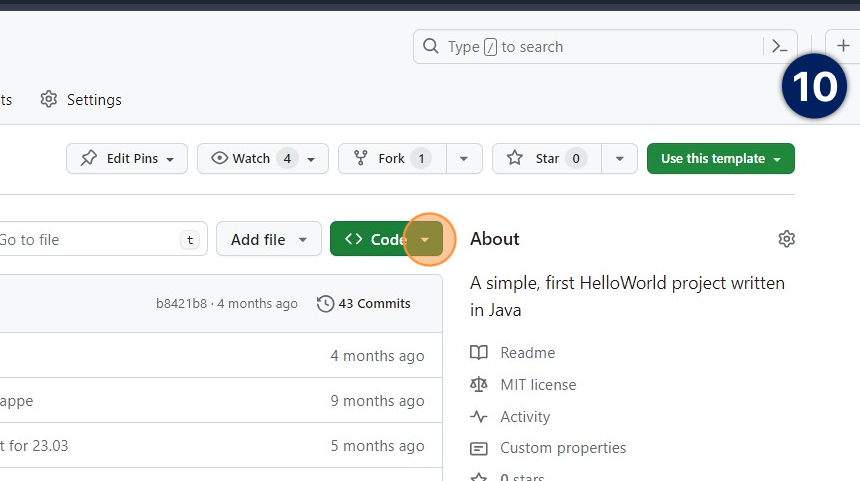
To begin, navigate to the HelloWorldJava repository and clone the project to your machine.
Click on the Code button
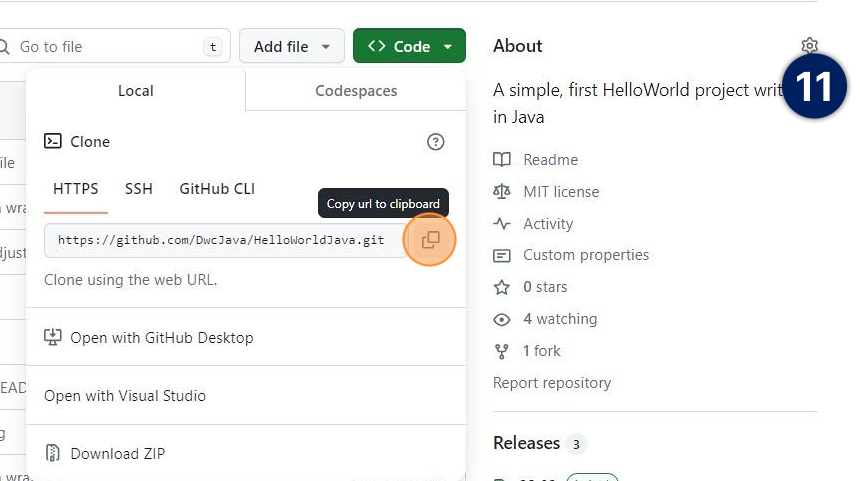
Copy the repository URL to your clipboard to clone
Once the project is cloned onto your machine, you can open it with your preferred IDE. Within your IDE, navigate to the pom.xml file that comes with the project. Within this file are various tags that can be modified to install your application to your own desired specifications.
For first time users, it is recommended to use the default settings and avoid changing the pom.xml that comes with the project.
Proceed to open the folder in your preferred terminal, and run the following command:
mvn install
This will run the installation plugin which will do the work of setting your project up for you.
If the above command does not work, check to make sure that your environment variables have been sufficiently edited to run Maven globally.
Once this process has been completed, you should be able to navigate top the following URL and see your program running:
http://localhost:8888/webapp/hworld